Many cheeses require to be hanged for varying lengths of time. So gravity and time can do their work and compact the cheese and drain the whey.
Some cheeses hang for an hour or less, some as long as a day. Most of the cheese I make hang overnight or 6-12 hours. Such as Feta which will be next tutorial.
I'm sure there are as many wheys to hang curd as there are cheeses. So these are only the few that I have actually used or seen used.
I will share with you my whey as well as a few others.
I have hung it off a broom stick between two things. I can't remember what 2 things I balanced the broom stick on! So, I probably shouldn't have made mention of this method. ha! But maybe you of the more awake world will think of some way to make that work. So, I mention it.
A friend puts a yard stick on the top of her kitchen cupboards over her sink and ties the bag of curds to that to hang. I have a bulk head on my cabinets and no extra space to store stuff on top of them...booo. So the was not an option for me.
I drilled holes in the side of my cupboards over my sink to fit a piece of metal rebar that we had laying around in the yard. The piece I found was not thick enough or long enough. So it fell if the cheese was too heavy or the bar was not put just even inside the cupboards. I got sick of that really quick and went looking for a thicker and longer piece of rebar. I successfully found one.
Pictured is what my current set up is for hanging curds to drain. Hard to see but its there, really.
Here is a close up of how the rebar goes inside the cupboard slightly.
{Ignore the bag of cheap, but real powdered sugar....gasp}
I cracked that baby open today and my husband LOVED it!
I was not completely thrilled, I enjoyed it. It was a little stronger flavored than I anticipated. I am just not used to REAL cheese. I am used to that blue label stuff. So is he.
He is the cheese HOG in the house, so if he's happy mommas happy. :)
This week I was teaching my 7 year old daughter, Elaine, about dozens and half dozens. We used an egg carton to count and talk about things in dozens. Today she seen a dozen and a half egg carton we have. She started talking to me about how it could hold a dozen plus six eggs or three sixes.
So began this conversation.
Me: If you had six apples and three people, how many apples could each person have?
Elaine: (holding up her finger) One.
Me: One each?
Elaine: Yes
Me: What are you going to do with all the extra apples?
Elaine: Find other people, cause you can only eat one apple at a time.
Me: Well you can eat more than one MM at a time. So, what if we had six MM's and three people, how many can each have?
Elaine: Two, cause you can eat two MM's at a time. Even a baby could.
I wish I had recorded it, it's really MUCH cutier hearing her say it.
School started for us 2 weeks ago, I think. You see we don't do a lot of book work. Mostly Math and reading and learning from real life experiences. So, I don't have an official start date and end date. I'm good with that.
I am seeing that my 2nd grader is retaining alot of information. I thought it was funny that half way through her 2nd grade Math book is teaching her the basic concept of how to read a recipe. She has been doing this for years now. She likes to be in the kitchen with mom.
My boys, 5th and 8th grade, are completely independent with their math.
Rotating chore charts we began using 2 and 1/2 weeks ago are still working out good. The concept is like Smockity Frocks Paint Chip chore cards. But we use printed sheets in page protectors and washable markers to check off when done. Like this...
IF someone wants to tell me how I can upload a pdf or a working copy of my charts I will be happy to share them in such a way that you can actually read them! lol I have them in Word. Or I can email them to you, if you request them from me.
I stayed up till 3 am last night watching Barbie Diamond Castle on youtube. I am such a party animal.
Yes, I was alone. Yes, I was on a desktop. It was the first time I had noticed that youtube has full length movies on it!
Am I the only weirdo that wonders if some sicko uploads videos on there that start out as kids cartoons and turn into something totally different and inappropriate?
Yogurt is one of the least time consuming things I make with our raw goats milk. I throw some stuff together and for the most part walk away. Here is how I do it. I had an old method using my oven as the heat source that was much more hands on and time consuming. I began using this method after Smockity Frock posted this tutorial of hers. http://www.smockityfrocks.com/2012/07/how-to-make-raw-goat-milk-yogurt.html So I began using my crockpot I got for christmas last year.
What you will need.
1. A crock pot that has "warm" setting and is large enough to fit your glass jar of yogurt that you will be culturing
2. A glass jar with lid. I use a 1/2 gallon mason jar. But if your making less yogurt you can use a smaller jar. Mason jars work well.
3. Fresh plain yogurt. I use Stoneyfield organic or my ownless than a week old yogurt. 1/4-1/2 cup per 2 quarts of milk. You can use powdered culture. I tried this once and did not like the flavor of the culture I used. So, I went back to using Stoneyfield. Moral to the story, Choose a yogurt you like the flavor of plain. Not to tart or bitter. But you can flavor the yogurt for eating.
4. Milk. I use fresh raw goats milk. But you can use store bought pasteurized milk.
5. Warm water
6. Thermometer that will read 100-120 degrees F. (not pictured I forgot to get it out)
7. Spoon
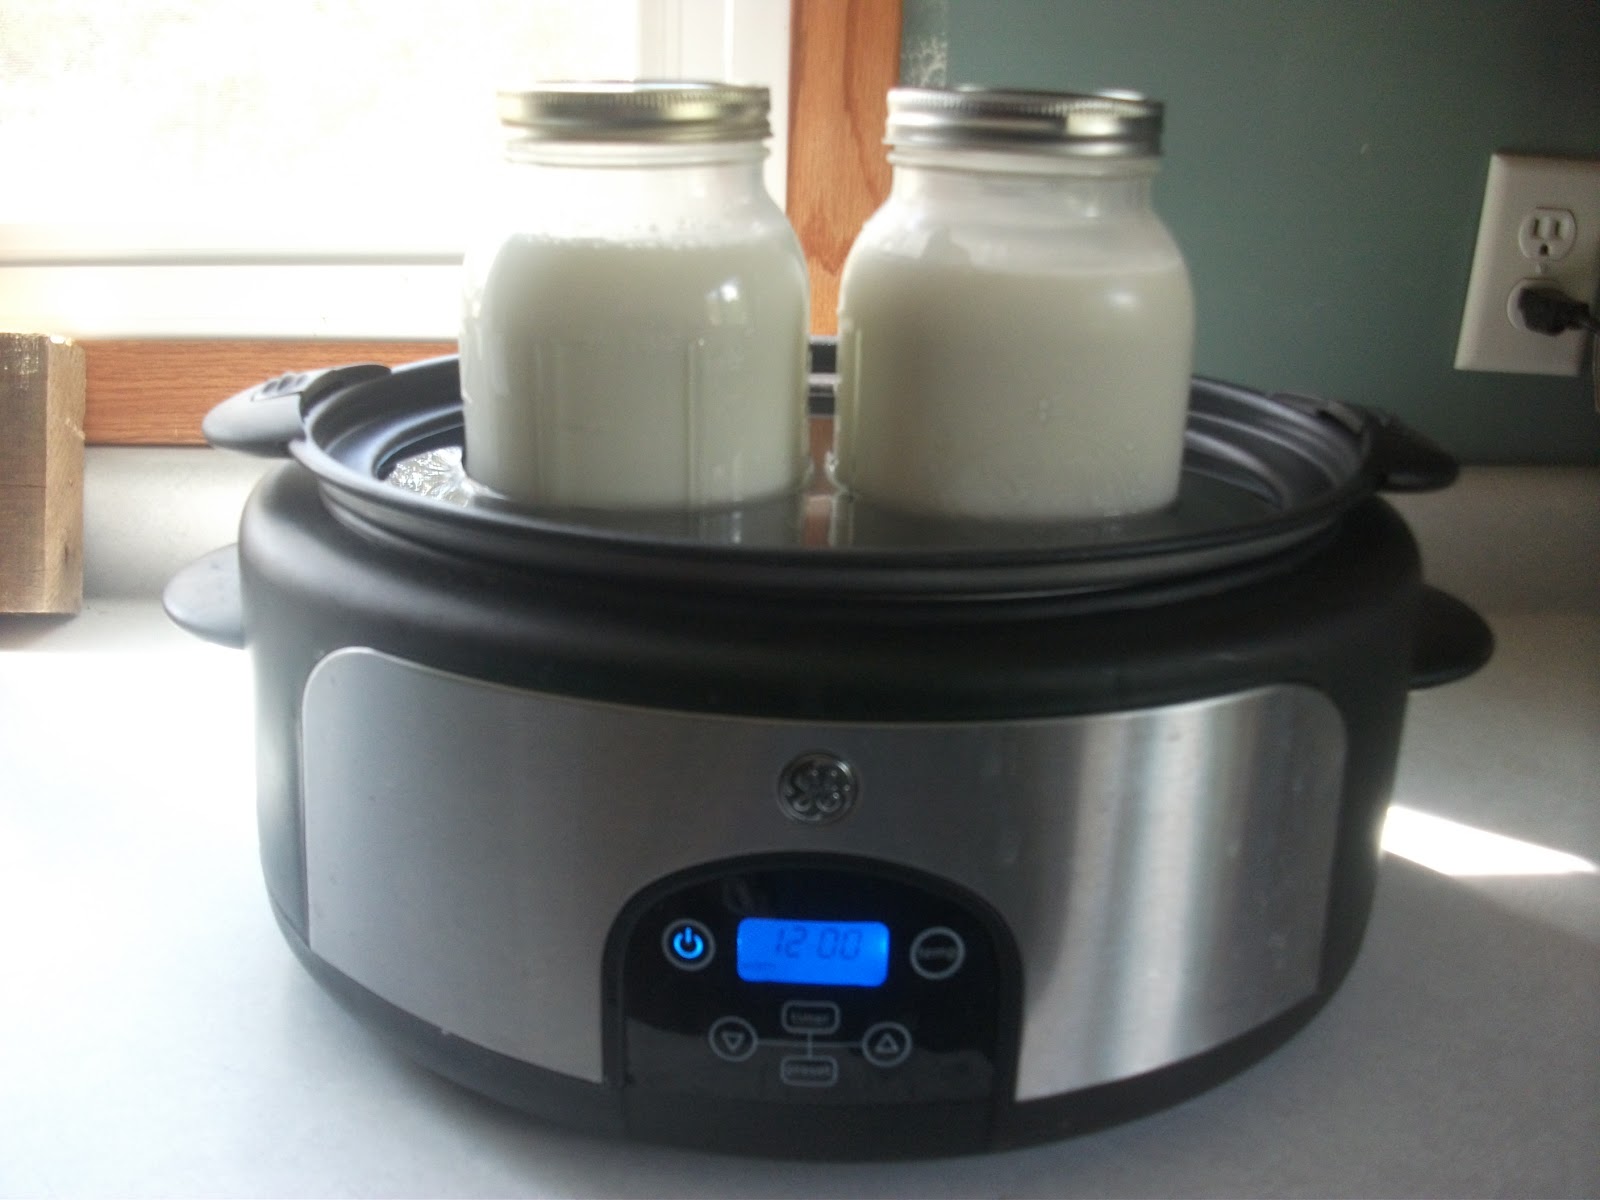
I LOVE using my oval crockpot with a timer. It fits 2 half gallon jars of milk/yogurt and I can set the timer on it for a few hours at a time and keep checking the temperature. Without worry of forgetting and it overheating and killing the yogurt bacteria.
I have goats and use 1/2 gallon jars to store my milk in. If I am making yogurt right after I milk my goats I just filter the milk into the jars with 1 cup empty for space to add yogurt and to shake it. If I am making it with cold milk already in the fridge I look for a jar that is filled about right and use that..adding or taking away milk so that it is filled to with in 1 cup of full. I use the lines on the side of the jar for measuring. So, I guess that would be 7 cups of milk per jar.. right? grin.
If making a quart you would fill with in 1/2 cup of full...and so and so forth for other amounts.
I have started with cold milk from the fridge and warm milk from the goats, but I never take the time to heat the milk up to a certain temperature like I've seen most tutorials say. I have great results with out adding this step. Nor do I pasturize my milk first by heating it up to 160-170...totally kills my purpose of owning goats. To have raw milk. I've also seen that others Sterilize their jars. I skip that as well, but your welcome to do either of those things. I prefer to save the time and take the risk.
I now add about a half cup of yogurt to each jar. I think I can use 1/4 cup, but I use 1/2. So you're welcome to play around with that. I just plop some yogurt in with a spoon until it is almost to the shoulder. So I know its less than a cup, but probably a bit more than a half a cup. More yogurt means faster culturing, but not faster by so much that I dare dirty a measuring cup to figure it all out. But as long as you have a 1/4 to a 1/2 cup per half gallon you're good. Shake, shake, shake, and shake some more till its good and mixed in. If your re culturing your own homemade yogurt and it stops working, buy new store bought yogurt. I have been able to use my own yogurt culture at least twice before having to buy more at the store. So, about once a month a buy a thing of yogurt at the store to culture with. I make yogurt weekly so that my culture is fresh enough. But things happen and sometimes it starts to weaken and needs replaced.
Put your jar(s) in the crock pot fill with warm or hot (if your starting with cold milk and yogurt this is fine to do) water to the top of the crock pot. The goal is to bring the milk and yogurt up to 110-115F and keep it there for 8-10 hours ish. I have had yogurt done in 6 hours. Probably started with warm milk and super fresh culture. I have let it go overnight as well.
Note you will NOT use the lid to your crockpot.
Turn your crockpot on warm (not low!) and set it for a 1-3 hours or set another timer to alert you for 3 hours if you have no timer on your crockpot or wish to set the crockpot timer for 12 hours. When your timer goes off check your temperature of your water and shake the jars if you want. Shaking is not necessary, but I am toucher, so I shake. If your temperature is too hot (above 115F) it will kill the yogurt culture. If too cold (below 100F) it won't activate it to multiply and turn your milk into yogurt. Once you get used to your particular crock pot, checking on the yogurt might not be necessary. I still do, because the temperature in your home will make a difference in how hot the crockpot gets.
If the temperature hits 115-120 turn the crockpot off for an hour and check back to it. With my GE crockpot and normal air temps (68-74F) I don't have to worry about checking or turning off the crockpot. When we had 90 and above air temps I had to turn off the crockpot every now and again.
The yogurt needs to culture until it thickens up. It will coat the jar and look about like drinkable yogurt you buy at the store. This will take 8-10 hours. Depending on air temps, if you use cold or warm milk, how much yogurt starter you use, and who knows what else. It will not be as thick as store bought yogurt, they use thickeners such as pectin or tapioca. You can add a thickener when you first put the yogurt starter in the milk, if you wish. I don't. I strain my yogurt to remove some of the whey to thicken it. I'll post a how to on that soon!
(insert picture of done yogurt coming later tonight! When this batch is done.)
I like to strain mine thick like Greek yogurt and add sweetener and vanilla for eating or freezing as frozen yogurt. I use it in place of sour cream when I strain it to the thickness of sour cream. I use it for cream cheese when I strain it to that consistency.
I LOVE comments and questions...so comment and ask away. :)
I can't believe its August already. I've been busy making cheese, dealing with 6 gallons of milk a day. Add to that getting our house ready to host a Wedding reception/baby shower partay for my Niece and her husband.
They married in February and our families are not big on "getting together" so it shouldn't be the biggest event of a lifetime. But it will be the biggest event held at my home, to date. It will be good practice for when my oldest graduates in 4 or 5 years. Homeschoolers, geez. Can't we commit to when he will graduate? Nah.
Anyway, I just wanted to update you that I have thought about many a blog post to put up. I need more hours in my day!
I want to do another cheese tutorial. Thinking Feta. So, expect that sometime this month!
There, I did it. I made a commitment. Now, hold me to it! Grin.
My life has been affected by suicide. More times that I care to admit. But I feel led to admit it, to talk about it. To heal my wounds. My prayer in writing this post is that someone who is struggling with dealing with suicide in their life will find some healing.
"Respect The Need To Grieve
Often ignored in their grief are the parents, brothers, sisters, grandparents, aunts, uncles, spouses and children of persons who have suicided.
Why? Because of the nature of the death, it is sometimes kept a secret. If the death cannot be talked about openly, the wounds of grief will go unhealed. "
My first close encounter happened when my sister's husband's Grandpa ended his life. Phew that was a mouthful! My sister clearly remembers our father talking to her husband. Telling him how sorry he was, that he didn't understand why someone would take their own life. I don't remember getting a full understanding of why he did this. I think there was a doctors visit that he just never came home from. Instead he went and ended his life. Maybe he got bad news that he just couldn't deal with.
A few years later the same man that didn't understand why someone would take their own life; understood why and took his own life. My father killed himself November 9th, 1995. First he took the life of my mother, then his own life.
I really think I would have gone to see him in prison had he not taken his own life. There are times I think of him with a hate so fierce that I grit my teeth. Then there are just as many, if not more, times that I think of him and long for him. I miss him and love him greatly. He had no right to pull that trigger on either of them. But he did and now we live with that pain daily. Not talking about it, doesn't make it go away.
In 2004 my sister in-law overdosed on prescription drugs that were not her own. I believe it was close to Christmas time. She had cancer. It's debated if she intended to end her life or not. But her life ended because of her self medicating with meds that were not her own. No matter what dealer gave them to her, she chose to take them.
In May of 2005 my mother in-law overdosed on prescription drugs that were not prescribed to her. She was a drug user for as long as I knew her. No one knows if she ended her life on purpose or accident. But I do know she was not forced to take those pills. Even if someone else handed them to her or got them for her. She was an adult who took too many pills trying to dull the pain of living and died because of it.
Her brother ended his life as well. My husbands uncle. His son died in a car crash, drunk driving, with in a year of my mother in-laws death. Then with in a year of his son dieing he took his own life.
Now fresh and new my paternal Grandmother ended her own life on July 8th, 2012. I'm sure my grandma must have wondered many times what my dad was thinking and why did he have to take his own life and his wife's life!? We didn't talk about it much. I wish it wasn't the elephant in the room that it has become. My Grandpa, her husband, has been in and out of the hospital for the last month. I have not been very involved in all of it and just heard about his troubles a week ago. I'm told his doctor said he was fine, normal old age stuff. Grandpa made up his mind that he was dying and stopped eating. He is alive and in the hospital right now. What was she was thinking that she decided it was better to die than to live, we will not know exactly. She was in pain. The dominoes tipped over and could not be righted again.
When my sister told me my dad had said he didn't know what someone would have to be thinking to end their life. The first thing I said was, "Lord, we are next!" The second thing I said was, "shit". As we both have said the same thing, many times now. Of course I was joking, but it really could be true. I pray I never feel that kind of desperation. I pray no one else feels that kind of desperation, but the reality is, they will. We live in a sin cursed world.
How much can one heart bear Lord? I hurt tonight Jesus, more than most nights. Wrap my Grandpa in your loving arms, Lord. Help him want to keep living. To get better and get out of the hospital. Help those that care for him know what to say to comfort him in his time of loss. Give the doctors wisdom and discernment in how to care for him. In Jesus name, Amen.
Lindsey had just left for softball, game. The kids and I were just starting to make milkshakes.
Lindsey sister called me and told me his mom was not doing good and was gonna die and to bring Lindsey right away. She overdosed at home. She died before we got there.
BUT I put the ice cream back in freezer and took the kids to a friends house and picked up Lindsey from softball. Had to tell my dear husband that his mother was dieing when I rushed into his game, just before it started. 2nd hardest thing I ever told him.
Kids didn't know their paternal Grandma that well, and they were young. Elaine was under a year old. She had seen her one time. Mother's day we took her over to see her. Elaine was born in February. His mom died in May.
I dropped the boys off at a friends. They were upset that we couldn't have milk shakes and they couldn't go with us. So, I promised them they could have milkshakes for breakfast. I must of took Elaine with us, but I dont' remember her going with us. I bet I picked up Lindsey then dropped the boys off. So the boys could sit in the car with her while I ran into the ball field. I don't remember carrying her into the ball field. I was nursing...so I am certain I didn't leave her with my friend.
That started the tradition of milkshakes for breakfast after someone dies. As long as we have ice cream and milk or can make it...we have gone and bought them at McD's before, too.
Call me crazy. I figure it's good to have something to look forward to after a sad night.
Tomorrow morning I will be making Milkshakes for breakfast. My Paternal Grandmother died this morning. A tradition that started with their paternal Grandma dieing has never saddened me like it is tonight.
My Grandma. Photo taken by my sister, Melissa. Who had this to say about her, "She never liked her picture being taken. You normally had to do it when she didn't realize you were taking it. This was taken last summer at Adam and Kady's wedding. Such a sad day for so many in our family. Grandma went through the pain of losing one of her sons to suicide and now she too has ended her life this way :( I hope to never understand the desperation or low that someone must feel to come to this point in their life. Sending my love and support to everyone in the family. RIP Grandma. http://www.suicidology.org/c/document_library/get_file?folderId=232&name=DLFE-242.pdf"
For those of you that don't know, the son of hers that took his own life... was my dad.
Sure the easy and obvious solution is to eat them. But if you want to keep a stubborn goat around, here is what I do that seems to work.
First, I have bottle raised goats and only have experience from that point of view. I have heard a dam raised goat is more "wild". So, good luck and it might take longer to get them tamed down. Just guessing.
Some of this is how I would milk any goat and will address kickieness as I go along.
I get the goat out of the pen, calling her by name. Let's use Angel as our "test" goat here. Since she is thee kickyest goat I have ever owned. I knew I was headed for trouble with her when she was still pregnant and would sit/lay down on the milking stand while I was trimming her hooves. My husband and I dragged her onto the milk stand twice a day, every day, for a week before she started jumping up by herself and it took 2 weeks total before I could trust her to get up there without needing the brute strength of my dear husband. This was all while she was still pregnant.
I had a 30 year goat veteran tell me that they wait till the goat kids and put her on the stand right away and don't mess around with training them to get on the stand prior to kidding. Of course that was after we wrestled a Angel for two weeks. Oye.
So, I have Angel out of the pen and she willing runs and jumps up on the stand. I put her head in the stanchion and lock it into place.
(insert pic of Angel on the milk stand locked into place prior to grain)
Since I have worked with Angel awhile now I do give her grain right away now. When she was very kicky I gave her grain after I brushed her and washed her udder. I was udders with a 1/2 a paper towel or a single select a size sheet. I have a few drops Shaklee Basic G of in a spray bottle of water. Some people find this is drying to the udder and so they use Shaklee H2 instead. I spray half the piece of paper towel with this, wipe the udder, turn to the dry half and dry the udder. If dirty I repeat.
(picture of spray bottle and paper towel)
I have already given her, her grain ration (about 4 lbs of grain), but if you have an extra kicky goat then you will give her grain at this point.
I sit down next her facing her rear, not facing her. I lean my shoulder into her side and reach up under her with my right hand as my right side is against her right side at this point.
Oh wait lets go back a bit. My milking stand is up against a wall. Then I can push her against the wall when she gets too wild. I have found my kicky goats like to be against the wall anyway. I tried flipping things around in my goat barn once and they freaked out. I had changed it so I was on their left and I had my left side against them. They all kicked and kicked. And I had trouble getting a grip on the Udder, since I am right handed its easier for me to reach under the goat with my right hand. I quickly switched it back. So, maybe address those issues in your milking set up. See if your kicky goat just wants to be milked from the other side, or with you leaning against her. Up against a wall or away from a wall. If you have a goat that was milked by someone else before you ask them what their milking area is set up like and what not that goat might just want what its used to. Did they hand milk or machine milk? Some goats are stubborn as, well, a goat!
So address those issues and come back, um Kay?
Glad to have you back. grin.
OK, so where were we?
Angel is on the milking stand. Happily eating her grain. I am sitting down facing her rear. Our right sides are touching with my shoulder leaning against her right side. I reach under her belly to her left udder with my right hand, left hand on right udder. I milk her.
Stubborn goat lifts her left hoof HIGH off the stand. I felt her lean towards me readying her self to lift a leg, so I pulled the bucket with my left hand towards me (away from her lifted/kicky leg). I used my right hand to grab her left hoof and pull it back down to the miking stand and hold it there about a half minute, while I resume milking one handed, using my left hand to milk and my right hand to hold down the offending leg. If it was her right leg I would grab it with my left hand and milk with my right. All in one sweep. I also loudly and sternly say, "Angel NO! Stand good." I release her leg after she has settle down and relaxed. In this case about a half a minute. I slowly release it, ready to grip it again if she shifts her weight like she is going to lift it again.
I have got her teat before and grabbed her leg and took her teat with it. That can't feel good to her. I wonder if that is the main reason she has decided to kick less...hm. So, if all else fails grip a teat and a leg and pull down. (insert evil laugh here)
I also take two stainless steel milk buckets out to milk my four goats. I put 1 frozen water bottle in each bucket to get the milk cooling right away. If you have a really kicky goat I suggest having 1 small bucket you can milk into and dump into the larger bucket(s) periodically. So you don't lose all the milk if she succeeds in getting her hove in the bucket. Or on the edge of the bucket and tips it. I would MUCH rather have a hoof in the bucket and have to dump milk than to have the bucket flip over and spill it everywhere. Easier clean up.
Angel is doing MUCH better. Meaning she lifts a leg up or kicks 2 or three times during our 10 minute milking session, verses 10 or more times. She also does not squat down on the bucket like she did a couple times before.
For squatting on the bucket I jam my shoulder up under her and lift up and tell her, "NO, Angel Stand good." I have been told you can put a bucket or stool or something under their belly, for really stubborn squatters. But she is the only squatter I have had and she does it very rarely.
My first two goats were kickers as well. For them tying them to the goat stand worked. So, I tried this with Angel, once. That was all I needed to know it was a very bad idea.
I tied bailing twine to the leg that she kicked with most often and tied it to the leg of the milking stand. tight enough that I thought she would not be able to lift her leg. She promptly backed up and created some slack and lifted her leg! Then she leaned forward and mule kicked, lots. End of experiment with tieing down her leg. Angel then thought, "That'll learn ya! Don't tie me down!"
York Photo hold a special place in my heart. My mother always mailed in her film to York for developing it.
I think how my kids say, "let me see!" Everytime I take a picture with our digital camera. I don't even own an old film camera anymore. That was how I felt when the developed pictures came in the mail. In my young adult years, I sent my film into York for developing, as well.
So, When I heard about this great offer from York I had to pass it along to you.
My 7 year old daughter, Elaine, decided she wants to learn to milk the goats. She is excited about it, too! That makes for one happy Momma!
She woke me up this morning to go out milk goats. She didn't want to miss doing it. She milked last night (1 goat) and this morning (all four). She milks them until their grain is gone and then I finish them off. She is working on aim, speed, and endurance. So she can milk them all the way through before they are done with their grain.
She is excited about milking them again tonight. When she was done this morning and stretching her sore kinked up hand she said, "I can't wait till tonight, so I can milk goats again!" What a trooper!
I think it is because of the recent tour of the farm that we gave a group of Girl scouts. Elaine wants to be in Girl scouts can you tell? She is the girl trying to steal the shot, front right.
They got to milk the goats.
Feed baby goats. Elaine was one of our tour guides. Helping at the baby goat feeding "station".
Make ice cream. And look she showed up at the ice cream making, too!
And do a goat mask craft that their leader had prepared for them.
She did make her own goat mask, after the Girl Scouts left. Their wonderful leader let her have supplies to make one with. It made her day.
This gal has been hanging out in our yard today. She has let the kids pet her and hold her, and scratched Collin when she was done being held, trying to get away. So, she is a normal cat. She has no tail. If you stopped by my house today, opened your car door and pushed your cat out. I thought you should know, we won't be buying cat food.
I let them feed her some scraps out of the chicken bucket. But. I. will. NOT. be. buying. cat. food. Nope. Won't do it.
This is what happens when you don't get the ricotta and whey you are trying to pour into a colander to drain all the "whey" on the counter before you let go of it. I thought it was more than half whey on the counter and turned it out it wasn't even a 1/4 of the whey on the counter. sigh.
I am VERY thankful that I wheyt for it to cool down before I pour it. The recipe says I only need to wheyt 5 minutes. It is 200 degrees F when I turn off the heat. I have been splashed with this hot whey when a clump of ricotta splashes into the colander. So, I wait at least a 1/2 hour. This batch I waited more like 10 hours, seriously. So, it was fully cooled down when it splashed on my foot. Sorry no pics of the foot with cooled ricotta on it. Haven't had a pedicure since March when the hubby and I went together for our anniversary for one. HA.
Our dog Sandy ate of the feast while I cleaned it up, too. She abandoned me before it was fully cleaned. Can't say I blame her. It is over 1 gallon of whey and ricotta mixed.
I am 37 years old, committed (though not institutionalized, yet) to my husband and our 3 preschool boys and 9 year old daughter, all 4 of whom have been adopted; but most of all to my Lord and Savior, Jesus Christ. I homeschool, raise chickens, try to garden and sell Stampin' Up! products. You can find my Stampin' Up! webpage here.
Joy Erskine on Forgiveness
Hebrews 12 1 “Therefore, since we are surrounded by such a great cloud of witnesses, let us throw off everything that hinders and the sin that so easily entangles. And let us run with perseverance the race marked out for us, 2 fixing our eyes on Jesus, the pioneer and perfecter of faith. For the joy set before him he endured the cross, scorning its shame, and sat down at the right hand of the throne of God. 3 Consider him who endured such opposition from sinners, so that you will not grow weary and lose heart.”
What hinders you today? What holds you back from being the kind of person God calls you to be in your marriage? Could it be that there is unresolved anger in your life? It may be something your spouse said or did (or neglected to say or do,) or, could it be that you are mentally beating yourself up over something you did so long ago?
Matthew 18 “21 Then Peter came and said to Him, ‘Lord, how often shall my brother sin against me and I forgive him? Up to seven times?’22 Jesus said to him, ‘I do not say to you, up to seven times, but up to seventy times seven.’”
Notice what he didn’t say… He did not say, “when he makes it up to you.” He did not say, “when you can figure out why he did it so that you can justify it in your mind.” He did not say, “wait until enough time has passed.” He simply wants us to forgive.
Sin against God, or offenses committed against us do not need to be justified to be forgiven. We need to call it what it is and remember that Christ died for our sin the same as he did for the offending person.
Now that doesn’t mean you can’t talk to him about it or tell him how you feel when this or that happens, but if we come to the other person with a spirit of forgiveness, I believe we will get a lot further than if we come hurling insults and spewing anger all over our spouse.
Matthew 18 15 “ If your brother sins, go and show him his fault in private; if he listens to you, you have won your brother.”
Galatians 6 1 “Brethren, even if anyone is caught in any trespass, you who are spiritual, restore such a one in a spirit of gentleness; each one looking to yourself, so that you too will not be tempted.
God doesn’t want us holding on to that anger – even if it is anger against ourselves. By holding on to that it’s like saying, “Jesus, I know you died for that sin, but that’s not good enough. I know they ripped out your beard and whipped you with shards of glass and spat in your face and nailed you to that cross and left you to hang there, but there has to be something more for this one.” We make light of what he did when we won’t forgive.
I found this as I perused Pinterest, “Holding on to anger is like drinking poison and expecting the other person to die.” Doesn’t make a lot of sense, does it?
So, forgive!
Forgive your spouse. Say this phrase often, “My mate is not my enemy!”
Who is our enemy? Satan! He does not want your marriage to last! Do not let him win! Forgive yourself! When you cling to that sin, you are denying the grace and mercy God has given you! You are denying Christ’s blood that was shed for you to wash away that sin. That does not mean that we can do what we want and just ask for forgiveness later – check out Romans 6-8 for more on that one! But God wants us – AS SOON AS WE REALIZE that we’ve done something wrong to RUN - first to the person we’ve offended and do whatever is in our power to make it up to them and then to accept His forgiveness for ourselves. He’s waiting, just as the father in Luke 15 was waiting and watching for his prodigal son to return. You’ll find Him running to you with open arms!
So, you've made cheese and want to know what to do with all that FRESH whey?
I make Ricotta cheese with my whey, as well as other things. This post will tell you how I make my Ricotta from Mozzarella whey. One of my previous tutorials was on how I make my Mozzarella. This tutorial picks up from there.
I already have my 12 quart stainless steel pot, my stirring spoon, and my thermometer. So, all I need to gather is my larger colander, my "whey" pot (a 14 ish quart pot I use to drain whey into for cheese making adventures), and a piece of unbleached muslin big enough to line the colander.
I just finished making the mozz. My whey is in the pot heated to about 175 degrees F still from using it in the Mozz recipe. As soon as I take the last piece of mozz out of the pot I turn the heat up on high and wash my dishes from making the mozz or go check my facebook and email. It will take about 10 minutes for the whey to heat up to the temp I need -200 degrees F. The whey needs very little stirring or tending to.
When the whey looks like this picture don't be tempted to turn off the heat and quit. It's still not ready yet. The proteins need to cook more to come together better. So be patient.
Here you will see what it looks like after you reach 200 degrees F.It boils and gets frothy. You can see the whey "chunks" They are small, but noticeable.
The whey and remaining curd is now separated out.
This is where I walk away and do whatever I want. Shower, milk goats, eat, facebook, play a computer game...my possibilities are endless! It needs to cool down for awhile before I dare handle it to dump it into the muslin lined colander to drain over a very large pot. The recipe says let it sit for 5 minutes. I wait more like 30 minutes. Then dump into this colander where it drains rather quickly, but as the curd comes out it sometimes splashes. So, I dump slowly and carefully. Probably more like pouring than dumping.
The draining will take about 1 hour, give or take 30 minutes. Where you will than have freshly made ricotta to put into lasagna, waffles, pancakes or any other recipe that calls for ricotta.
The above picture was taken after I had already scooped out about 3/4 of the ricotta that was made. I scrap it out and put in a covered bowl in the refrigerator. I do not add any salt to it, but you could if you like it that "whey". I should stay fresh for about a week or two, I'm guessing. If it's moldy toss it out. grin.
I put 1 cup of ricotta and 2 cups of the whey that was left over in these waffles. I will blog that recipe another time. :) But they are yummy and higher in protein than just plain waffles.
Just in case you missed it here is the Mozzarella Tutorial I put up yesterday.
I make mozzarella with our goats milk. Lots of people have asked me how I do this. I am always happy to have people over to show them how I make mozzarella. Tonight I decided to bring you my "whey" through blogging, pictures, and videos. I hope you find this informative and fun!
I put two gallons of raw goats milk in the stainless steel pot and turn it on low, while I gather all my supplies.
I will need....
Large stainless steel or porcelain coated pot with lid. Mine is a 12 quart stainless steel.
Long "knife" to cut the curd. I use a frosting spatula for frosting cakes.
Thermometer that will register at least from 50 degrees F to 200 degrees F.
Slotted spoon for stirring and scooping the curds.
Two small cups or bowls with 1/4 cup of cool non-chlorinated water in each.
1/2 tsp and 1 tsp measuring spoons
Medium bowl 3/4 full of ice water.
Strainer/colander with small holes.
Small bowl that the colander will rest comfortably on top to drain the curds.
Rennet (1/2tsp) Dissolved in one of 1/4 cups of water. You can use animal or vegetable rennet. If you use double strength use 1/4 tsp.
Citric acid (2- 2 1/2 tsp) dissolved in the other 1/4 cup of water. Got mine at my local health food store. I am currently using 1 tsp per gallong of raw goats milk. It is spring time, in the fall I may need to use more.
Two gallons of milk. Fresh raw milk is best. I used Raw goats milk from my own Saanens. You can half this recipe and use 1 gallon of milk. I prefer to work in larger quantities.
Kosher salt to taste, about 1/2 tsp is what I used. (not pictured here)
Kitchen latex gloves. They are usually yellow, though mine are green. You will be able to see my cool gloves in the video. I forgot to get them out of the draw for the picture. They are sold in the cleaning aisle. You want a brand new pair that you use only for making cheese. You will be holding the mozz and stretching it while wearing these. It helps so you don't burn your hands.
For Ricotta you will need a large colander and a very large bowl or pot. Big enough to hold about 1.5 gallons of whey. I will cover that in my next blog as this one got "whey" long "whey" fast! And now I am "whey" tired!!!
The milk needs to reach 50 degrees F and then I will add the Citric acid that has been dissovled in 1/4 cup of cool non-chlorinated water. I often get side tracked. I have found that I usually end up adding the citric acid as late as 80 degrees F and it turns out fine as well.
I can't help but multi-task. These are the dishes I am washing while the milk heats. I'm not good at "whey"ting.
After I got the temp to 70 degrees F I added the citric acid and stirred the milk a bit, maybe a minute. I continue heating the milk to 90 degrees. I should stop multi - tasking and pay attention at this point. I want to add the rennet and turn off the heat when the milk hits 90 degrees F.
I was successful at adding rennet at the correct time. BUT I forgot to turn off the heat and the milk did get to 96 degrees F before I screeched in horror. Really, you can ask Lindsey, my husband. He thought I was burning the place down or had left the gas running with the fire off. This might be the reason I didn't get as good of stretch as I would of liked in the video.
UPDATE: I added the rennett at 85 degrees F this morning, turned the heat off and put the lid on for 5 minutes. It turned out MUCH better than last nights Mozz. I have uploaded a new video at the end to show how the stretch looks shinier and smoother.
After I added the rennet I stirred about 20 seconds. I would then turn off the heat, ahem, put the lid on, and set the timer for 5 minutes.
When the timer goes off I check the curd for a "clean break". It almost always has a clean break. If it does not let it sit another minute and check again. Let it sit too long and you are making rubber tire cheese.
It looks like this.... See how when I put the cake frosting knife thingy in the curd and lift sightly the curd cleaning breaks? Yeah, I know its hard to see it in this picture.
Now I cut the curd.
I cut it with the knife straight down into the pot, like pictured. I cut the curd vertical and then cut across those cuts, like pictured. To make tall 1/2 inch cubes. The curd goes down into the pot, deep.
I then put the knife in at an angle and cut the deep part of the curd. Like so...
I turn the knife 4 different direction while cutting the curd at an angle.
Even with all this cutting I still have long curds when I began cooking the curd in the next step. I just cut through them with my slotted stirring spoon. Like so...
See the large curds in the middle of the pot? Those I cut up more with my slotted spoons edge. Also note the white curd residue on all around the edge of the pot. It looks like lots of bubbles, but it's curd. I scrap this off with the edge of the slotted spoon. I find that if I leave it there it cooks on and becomes difficult to clean the pot. *I will cover cleaning the pot in the next tutorial on making Ricotta.*
Now that it's all cut up I turn the heat back on low and slowly heat the curd up to 103 degrees F, while SLOWLY and gently stirring the curd. I stir it to prevent it from matting up into one mass. I will continue to break up large pieces.
Now you get to see the first of several awesome videos I made for this blog. I'll let it speak for its self. I mean I'll speak in it for me.
Once the temperature reaches 103, I turn off the heat and set my timer for 3 minutes. As stated in the video. After the timer goes off I begin fishing out the curd with my slotted spoon.
When finished fishing, my strainer will be full to the brim. Like so...
UPDATE: I've made this more than a few times and I've noticed I get a lot more curds when something has gone wrong. My finished product it usually a bit rubbery then, but still edible by my kids standards. After it sits in the fridge over night and soaks in the salt, it is usually less rubbery. UNLESS, I have done something massively wrong and then I end up with tire rubber cheese. That I then feed to our chickens. No one around here will eat tires.
When all the curd is fished out I turn the stove on high to heat the whey up as fast as possible. I don't like "whey"ting, remember? Don't worry I will have more whey jokes for your enjoyment.
It's draining whey off into the bowl below...
UPDATE: paid attention and this is "whey" too much whey draining off in this step. IF I get the temp, acid and timing right the curd leaks out about half this amount of whey in this first draining.
I pour this whey into the big pot on the stove to be heated. When the curds dripping slows down I turn it over. I flip it upside down in my hand and pry it out with my fingers. Then it looks like this....
I'm weird so this of course if "whey" cool to me! I like the "whey" the curd mats all together and gets the mesh boxy texture. The curd will then drain some more and get all textured on the now turned down sound.
After it stops draining on this side, I remove the curd from the colander and cut it in half with my "whey" big frosting knife thingy... then I realize that I didn't list this platter on my things I get out to use to make mozz cheese list...oops!
I then return it to the colander cut sides down to drain some more whey out.
I call this butt curd.
Anyway...I let drain...yup you guessed it, till the dripping whey slows down. I dump the whey into the pot that is taking "whey" too long to heat up to 175 degrees F. You can speed up the heating by dumping 1/2 the whey out, but I keep it all in the pot because I need the why to make the ricotta from the next tutorial.
After the dripping slows, I cut it yet one more time.
These are curd mountains draining cut side down. With no more cutting left to be done, they will remain this "whey" until the whey is hot enough to start warming the curd in it.
It takes about 10 minutes for the whey to reach 175 degrees F. Once it does, I turn the heat to low to try to keep it at that temperature.
Now that the "whey"ting is over...the "ball" of mozz goes into the very hot whey!
Now I will let me speak for myself, video style...
Yes, each video may look very much the same, before clicking play...they are indeed 3 very different videos.
'WHEY' cool right!!!??? I love the stretching part. It is not as pliable as it should be. Like I said before it either got to hot when I forgot to turn off the stove when the curd was coagulating or I need to start adding more citric acid. OR another option would be I need to cut the curd sooner. Cheese making is an ever changing ART.
The now stretched CHEESE (it's not curd anymore) is cooled down in the ice water bath. I remove it and place it on the forgotten platter to be sprinkled with kosher salt. For cheese making you must use non-iodized salt that is larger in texture than table salt, but not as big as rock salt. I choose to use Kosher salt, but there are cheese salt flake thingy's you can buy from a cheese making supply company. I'm cheap and Kosher salt is cheaper.
Here is the salt I use. I just sprinkle some on both sides. OR I try to take a picture while shaking the salt on and I dump a bunch on one piece than quickly set camera down and begin rubbing the other pieces of cheese in the pile of salt on both sides. My family likes salt, so a coat on both sides is not too much salt. Though I usually just have a sprinkle on both sides.
I then stack them up in a piece of plastic storage stuff with a lid on it and put it in the fridge. Though as you can see, my kids are "whey" inpatient and we of course have to taste test it. The upper left piece seems a bit to straight on one side and smaller than the other pieces. That's the "whey" the cheese is cut to be eaten in strips. :)
If you have any questions about what I was doing or why, feel free to ask. I will do my best to answer your questions.
I bet you can't wait to read the next tutorial on making ricotta? I use the whey from making Mozzarella, even though everything I read says, "it can't be done." I, my dear friends, do it! And you will be able to, too!
UPDATE: I made a new video of the final stretching process. You will see that the cheese is much shinier and smoother.
Do you have about 5 minutes a day to spend praying for your spouse? Did you know that doing so each day over the course of 31 days can improve your marriage?!?
Every marriage has room for growth - some more than others - and one of the best ways to grow your marriage is pray Scripture for your spouse.
Not only will you see your prayers answered and your marriage improved {because when you pray the Scriptures in their proper context, you are praying the will of God}, but you will grow in your own faith!
Based on the ebook, 31 Days to Build a Better Spouse, the Challenge begins on June 4th and will focus on praying for a different aspect of your spouse’s life each day. Each day’s prayer focus is founded on the Word of God and the prompts will have you praying Scripture over your spouse.
Ashley Pichea invites her blog readers to join her in “doing LIFE together – living intentionally by faith everyday” at LIFE by Ashley Pichea where she shares faith, family, and the adventures of homeschooling. Ashley invites you to connect with her on Twitter {@apichea} and Facebook {fb.com/ashleypichea}.
Sunday- Cereal and 2 mini cinnamon rolls for breakfast. Lunch was homemade lasagna. I popped my frozen one from about a month ago in the oven before we left for church on 170* and hoped for the best. It was almost done when we got home. I turned it up to 425 and it was ready when the garlic bread was.
Dinner? What did I eat for dinner? OH yeah a piece of homemade mozzarella and a big bowl of strawberries. I think I ate another bowl of cereal, too. :/
I am not going to eat another bowl of cereal this week! I am seeing a pattern here. I made homemade whole wheat waffles on Saturday and I have real maple syrup. I will eat that, instead of cereal.
Cleaned out the baby goat pen and walked the goats around the yard to browse/eat.
Not enough water.
Monday- I think I finally drank enough water, I was soo thirsty today that it was easy to do.
Breakfast 1 homemade 100% whole wheat waffle with local pure maple syrup. YUM.
Lunch on the go - homemade mozzarella and an apple.
Snack - several mini chocolate donuts :/ sigh.
Dinner - pita pizza
Exercise - I cleaned the barn for over an hour today. My back is a bit sore, but not too bad. :) ya!
I also ran errands this afternoon. I made 1 gallon of yogurt and made 2 gallons of milk into mozzarella. I am TIRED!
Tuesday- Screwed up 2 gallons of milk trying to make into mozzarella. Tire tasting cheese anyone? Rubber. eww. Chickens ate it.
Picked up 2 way ward chillins yesterday. My most precious niece and nephew, whilst my brother and their mother are in California and Vegas on a vacation of sorts. My time is coming, just happening with my childrens. :) The 16 month old is a crier during the day, but he sleeps through the night HERE. grin. He won't do that at his home. God knows what I can handle, and sleepless nights are not on that list. Apparently.
I had cereal for breakfast (yeah I know). Lunch was food (not sure what kind). Dinner was food as well. Water intake was at about half and I cleaned the barn whilst the baby napped.
Wednesday- bran flakes with a banana sliced over top of it. (yes that is cereal) Lunch was pita pizza. Dinner would probably be a 2 cookies from McDonald's, a handful of mixed candies, and a huge bowl of chips or was that 2 huge bowls?
Water intake was at about 3/4 and I finished cleaning the barn whilst the baby napped.
Thursday- Breakfast Homemade whole wheat waffle with real maple syrup.
Lunch- 1/2 a bag of junky chips and watermelon.
Dinner- Steak, fried potatoes, and homemade mac n cheese.
No exercise and not enough water.
Friday- Went to and was an expo-er at "The Makers Expo" at our homeschool building. (click on the link for info on what that is) I took my soaps to sell, information on herd shares and made soap and cheese! It was SO fun!
I had (you guessed it) cereal for breakfast.
Took lunch with me and it was last nights leftovers plus an apple. And the Girl scout booth had homemade cookies and some popcorn concoction that was addictive.
Dinner- left overs from last night, again! WOW I made a lot of food! HA We all ate it 3 times!
Exercise standing on my feet all day and walking around the expo. Water, eh not so much.
Saturday- Breakfast an apple and water.
Lunch waffles, candy and chips.
Dinner- salad, bread, chicken Alfredo and brownie and ice cream. Went to a "Sisters Appreciation Banquet" at my Mormon Girlfriends church. I tell you, I definitely don't agree with most of their "doctrine", but boy do they know how to pamper their women. :) The men put this dinner on. I have been the last 2 years. They go all out. Set the tables all pretty and have salad, bread and dressing on the table. They come around and take your order if you want Alfredo chicken or spaghetti meat sauce. When your done with your salad they bring your main course. When your done with your main course they bring out your desert. The whole time clearing your dirty dishes and keeping your water filled. If you want seconds on anything there is always plenty. They were kind and attentive and it was a nice time with my friend and her friends. :)
Quite a bit of water, but not enough. No exercise, though I am very very tired.
I had such a wonderful time at the Makers Expo at our homeschool group today I just had to tell you all about it!
The Makers Expo was organized by the City Works class at Bedford - Gull Lake Homeschool Partnership. The idea was to showcase things that you make!
I took my goats milk soap to sell. I also took soap and cheese making supplies and made both as a demonstration.
Soap went well and once the Lavender EO was added it smelled wonderful in the hallway where I was making it.
Soap was poured into molds a little after noon and I took a lunch break. I was able to talk soap with many many people. Made new friends and exchanged business cards with a few peoples.
When I was getting my lunch ready my dear sweet husband surprised me and showed up 3 hours earlier than I expected him. He already had plans to come after work, he got out early so he would have hours left to work Saturday. He hung around and watched my booth while I ran home to get two very important things I needed to make the mozzarella, Latex kitchen gloves and my slotted metal spoon. What a good man! He could of went home and came at the time we had discussed, but he came early and we had FUN. Fun, I say! We had FUN.
Mozzarella was wonderful! I was nervous about making it because the last time I made it this week it was like eating a tire. Yes, really it was that rubbery, tasteless and just plain gross. I'm glad I knew what I did wrong and didn't redo the same mistake.
When it was done I walked around the Partnership building giving out samples of the cheese. I LOVE words of affirmation and boy was I showered with them today. Not one single person said, "eww that was gross."
I did however hear several people saying, "that is awesome!" and "that is the best cheese ever!" People keep telling me how much they like my cheese, but I always wonder if they are just being nice. I'm starting to believe it really is actually wonderful cheese!